We live in a world full of light, color, and motion, but what we see is just a small slice of reality. Our eyes can only detect visible light, which means we miss out on a lot happening around us, especially heat. That’s where thermal imaging cameras change the game.
These smart devices let us “see” heat, even in total darkness, fog, or smoke. From spotting hidden issues in machines to finding people in emergencies, thermal imaging opens up a completely new way to view the world. But what exactly is a thermal imaging camera?
In this guide, we’ll break it down, What Makes Thermal Imaging Cameras Useful, so you can understand the technology and its real-world benefits without needing a science degree.

Quick Navigation & Previews
What is a Thermal Imaging Camera?
A thermal imaging camera, also known as an infrared camera, is a smart device that detects heat (also called infrared radiation) instead of light.
- Regular cameras need light to work.
- Thermal cameras work in total darkness, smoke, or fog.
- They show temperature differences by converting heat into images.
These cameras display the image in different shades, often using grayscale or false colors—hotter objects appear brighter, cooler ones appear darker. This makes it possible to spot things that are invisible to the eye.
What Are Thermal Images?
Thermal images are also called thermograms. They don’t look like regular photos with colors and details. Instead, they show heat patterns.
- Hot objects may appear white, yellow, or red.
- Cooler areas show up in blue, black, or dark gray.
Everything above absolute zero emits heat. These images translate that hidden heat energy into a picture we can understand, offering a totally different view of the world.
How Does a Thermal Imaging Camera Work?
Understanding how a thermal imaging camera works helps you get the most out of this powerful tool. Whether you’re in construction, firefighting, maintenance, or even home inspection, these cameras are designed to detect heat (infrared radiation) and convert it into a visual image.
But before capturing any images, there are important steps to follow to ensure accuracy, clarity, and safety.
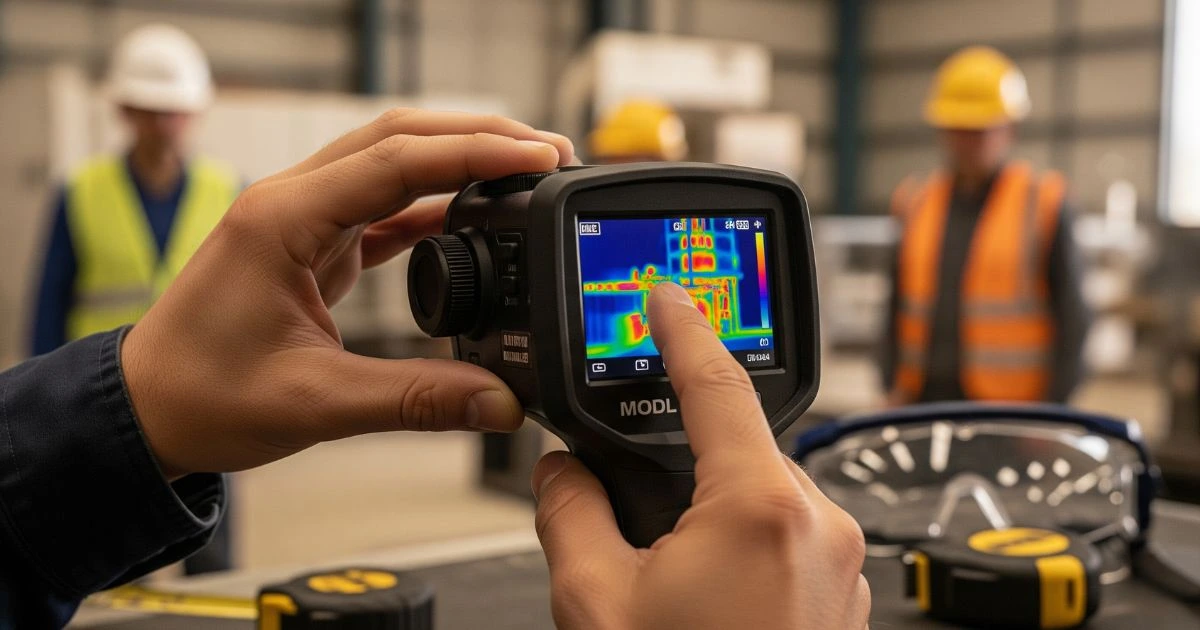
Step 1: Prepare the Camera Before Use
Check Environmental Conditions:
While thermal cameras can work in darkness and smoke, external factors like heavy rain, thick fog, or extreme cold can still affect accuracy. Always check your surroundings before use to reduce distortion and get the clearest thermal image possible.
Charge Fully and Calibrate the Device:
Ensure the camera is fully charged before heading out. Just as important is calibration, which aligns the sensor for accurate temperature readings. Most modern cameras guide you through an auto-calibration process, but always follow the manufacturer’s instructions.
Adjust the Focus:
A blurry image can lead to missed details. Most thermal imaging cameras come with manual or auto-focus features to help sharpen the image based on the distance to your target. Sharp focus is key for detecting small temperature differences, especially in inspections or diagnostics.
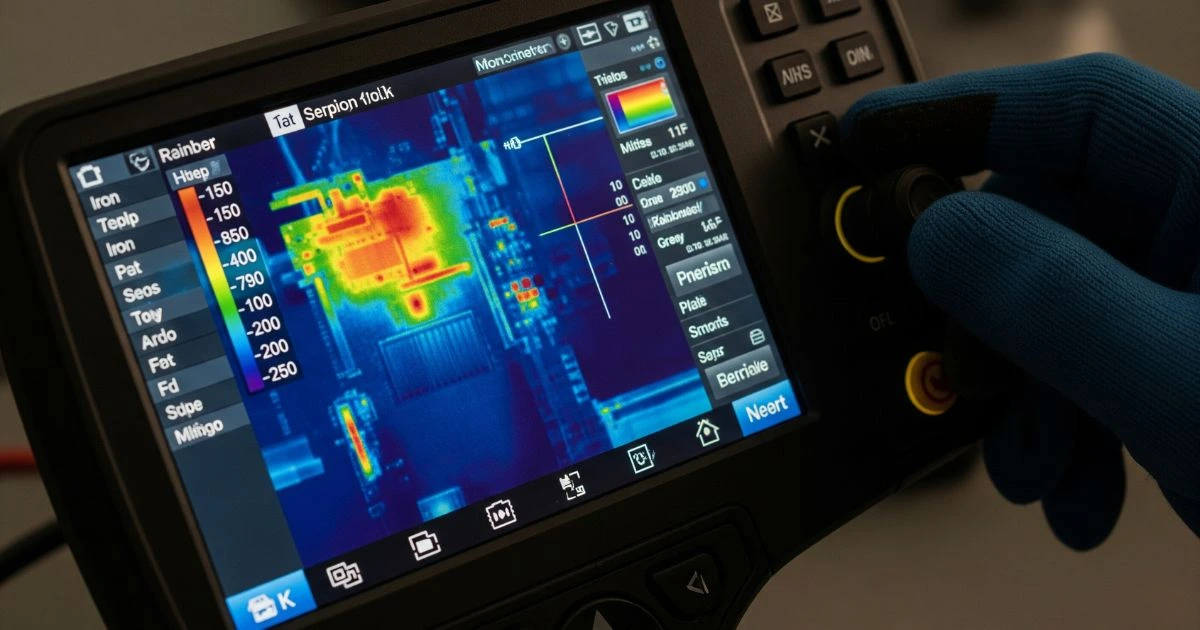
Step 2: Fine-Tune the Settings for Accurate Results
Set the Correct Emissivity:
Not all surfaces emit heat in the same way. Materials like metal reflect heat, while others like wood or concrete absorb and emit it. To ensure accurate temperature readings, adjust the camera’s emissivity setting to match the material you’re scanning. Most devices include a built-in table or presets for common materials.
Select the Right Temperature Range:
Narrowing the temperature range allows the camera to show better contrast in the image. For example, detecting small temperature changes in electronics might require a tighter range than scanning a large outdoor area.
Choose an Effective Color Palette:
Thermal images are shown in different color schemes—grayscale, ironbow, rainbow, etc. Each palette highlights heat patterns in a unique way. For example, the rainbow palette makes small differences easier to spot, while grayscale is better for general inspection. Pick one based on your task for better visibility and faster interpretation.
Step 3: Capture, Analyze, and Use the Image
Scan and Observe the Target Area:
Once everything is set, point your camera at the area you want to examine. You’ll instantly see heat variations on the screen—hot spots, cold spots, or even hidden problems like air leaks or electrical faults.
Save the Images or Record Video:
Most modern thermal cameras allow you to take snapshots or record videos. These can be used for detailed analysis, shared with clients, or included in inspection reports. Some cameras even tag the location or timestamp automatically.
Use Spot Temperature Tools:
Advanced thermal cameras feature spot metering, allowing you to check the exact temperature of specific points on the screen. This is especially useful in identifying overheating equipment, energy loss, or even hidden moisture damage inside walls.
Step 4: Wrap Up and Store Safely
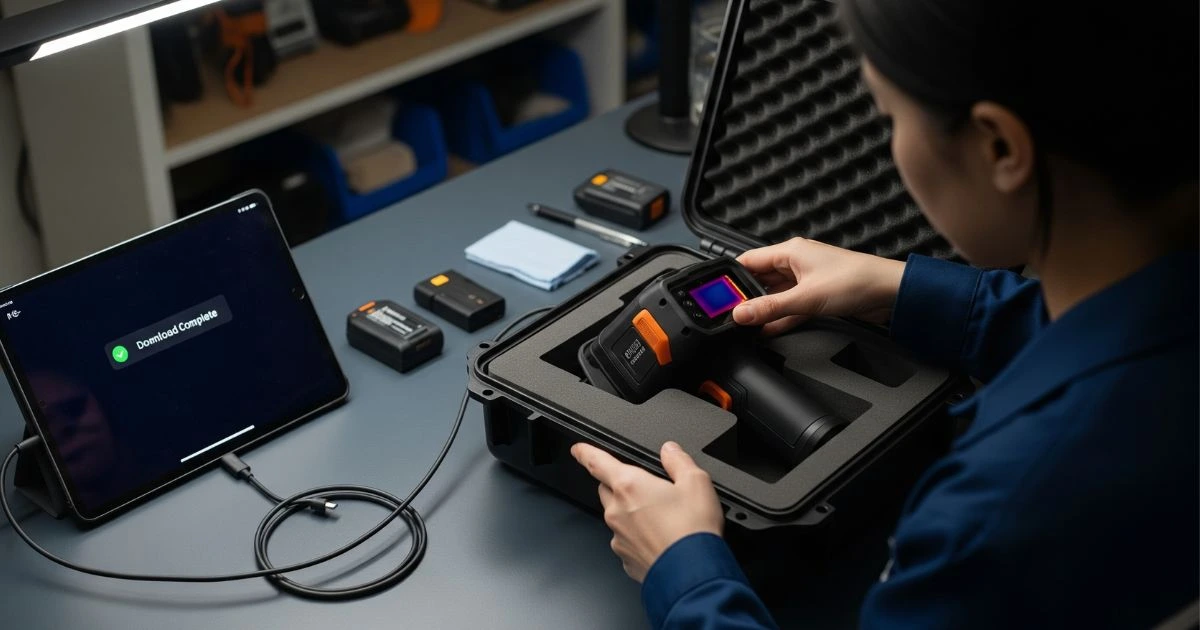
Download and Review Data:
Transfer your captured thermal data to a computer or tablet using USB, SD card, or Wi-Fi. Use the manufacturer’s software (often free) for enhanced analysis, such as comparing temperature trends or generating client-ready reports.
Power Down and Store Properly:
We live in a world full oplease f light, color, and motion—but what we see is just a small slice of reality. This protects sensitive components and extends the life of your investment.
Following these steps ensures that you get accurate, useful thermal images every time. Whether you’re diagnosing problems in electrical panels, checking home insulation, or ensuring workplace safety, a properly used thermal camera helps you make informed decisions quickly and confidently.
What Makes Thermal Imaging Cameras Useful?
Thermal cameras open up possibilities in many industries by showing what the human eye can’t see.
See in Complete Darkness:
Unlike regular cameras, thermal imaging works in zero light, as well as smoke, fog, or haze. That’s why firefighters, security teams, and search-and-rescue crews rely on them.
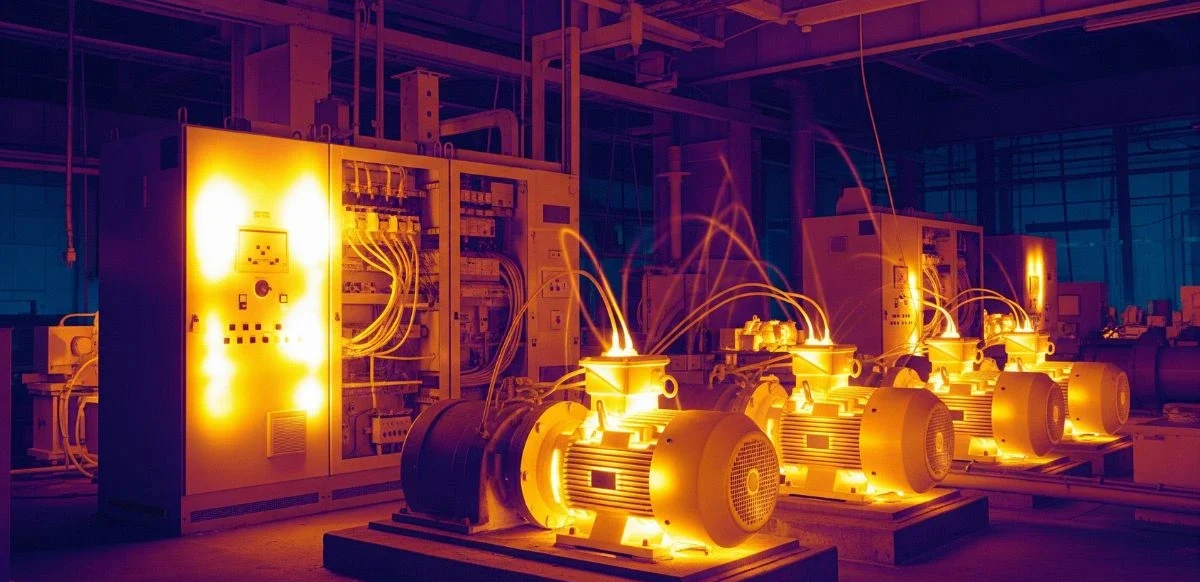
Visualize Heat Patterns:
Thermal cameras create heat maps that show which objects are hotter or colder. This helps spot:
- Overheated machinery
- Electrical faults
- Hidden water leaks
- Insulation problems
No Need to Touch Anything:
Need to check something dangerous or hard to reach? No problem. You can measure heat without touching the object. It’s ideal for:
- Power plant inspections
- Building energy audits
- Food safety checks
- Medical diagnostics
Better Awareness in Dangerous Situations:
In high-risk places like factories or disaster zones, thermal cameras help professionals make quick decisions. By showing where people or hazards are located, they improve safety and efficiency.
Game-Changing Technology
Thermal imaging cameras are no longer just for experts or science labs—they’re being used every day in industries like firefighting, construction, medicine, and law enforcement.
They help you:
- See heat in darkness
- Spot dangers before they become problems
- Take temperature readings from a distance
- Work safely and more effectively
As this technology continues to improve, we’ll likely see even more amazing uses in the future.
Conclusion
Thermal imaging cameras are smart, practical tools that reveal what the eye can’t see. With the right setup and proper use, they deliver fast, reliable insights across many industries, making your work safer, easier, and more efficient.
Leave a Reply