Curls are unique, full of personality, and absolutely beautiful. Still, there are times when you may want to switch things up and try a different look. If you’ve ever wondered how to brush out curls without ruining them, the good news is that it can be done with the right approach – no need to sacrifice your hair’s natural health and shine.
Brushing curls isn’t as simple as running a comb through your hair. Without the proper care, curls can quickly turn into frizz, lose their bounce, or even suffer damage. That’s why understanding the right techniques and products makes all the difference.
In this guide, we’ll walk you through simple, practical steps to brush out your curls safely. Whether you’re preparing for a sleek style, soft waves, or want to manage your hair more easily, these tips will help you achieve a smooth result while keeping your curls healthy and strong.
Quick Navigation & Previews
Steps on How to Brush Out Curls Without Ruining Them
Brushing curly hair takes more than just running a brush through it. To keep your curls smooth, shiny, and damage-free, follow these simple steps:
Step 1 – Wash and Condition the Right Way
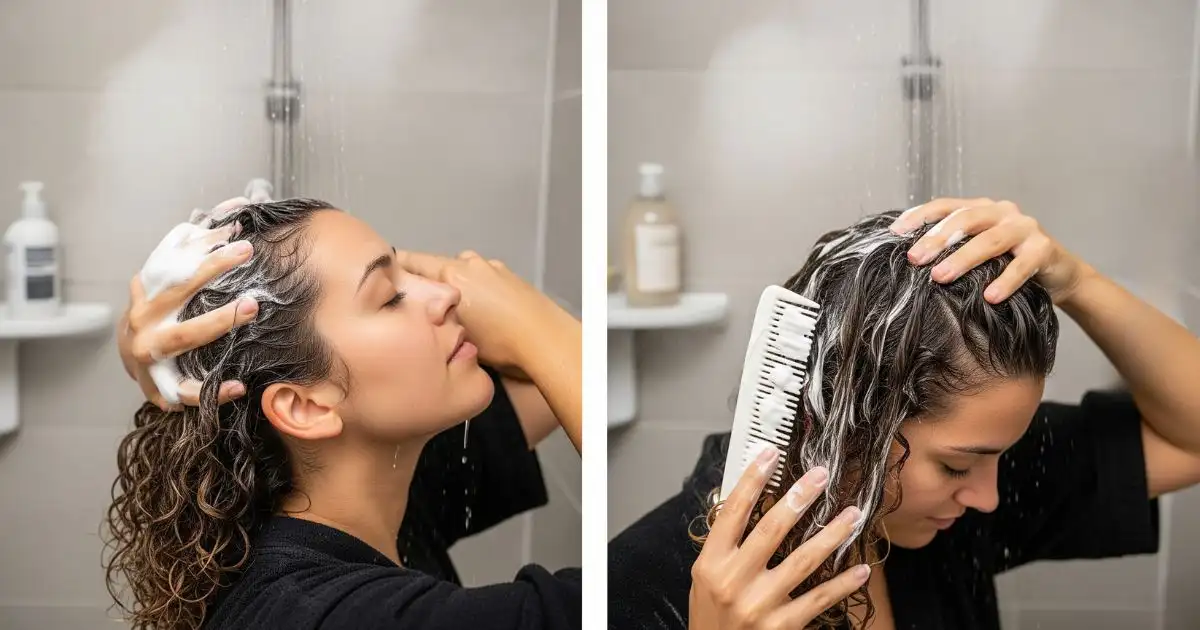
The first step to brushing out curls without ruining them is proper prep. Start by washing your hair with a hydrating or smoothing shampoo, followed by a nourishing conditioner. This softens the hair, making detangling much easier.
Now, remember to avoid actually applying any conditioner to your roots. You want to place it only on the ends and the middle of your hair. Take up a comb (wide-tooth is best) and run it through your hair so you can untangle it. Additionally, allow the conditioner to sit for a couple of minutes. Avoid using water that is either very hot or very cold. Cold is obviously uncomfortable and will mess with the conditioner. Very hot water can dry out your hair and cause it to become frizzy unnecessarily.
Here’s how to do it right:
- Use a sulfate-free, moisturizing shampoo that gently cleanses without stripping natural oils.
- Follow with a deep conditioner or curl-friendly conditioner to soften and detangle.
- Apply conditioner mainly to the mid-lengths and ends, not the scalp. Applying it to the roots can make hair heavy and oily too quickly.
- Detangle your hair while the conditioner is still in, using a wide-tooth comb. This minimizes breakage and makes brushing later much easier.
- Let the conditioner sit for 3–5 minutes before rinsing, allowing your hair to absorb all the nutrients.
- Rinse with lukewarm water to remove excess product, then finish with a quick splash of cold water. The cold rinse seals the cuticle, making your hair shinier and less prone to frizz.
However, once you’ve finished everything and washed it out with lukewarm water, you can then rinse it briefly with cold water. This will make it shine and will flatten it out a bit.
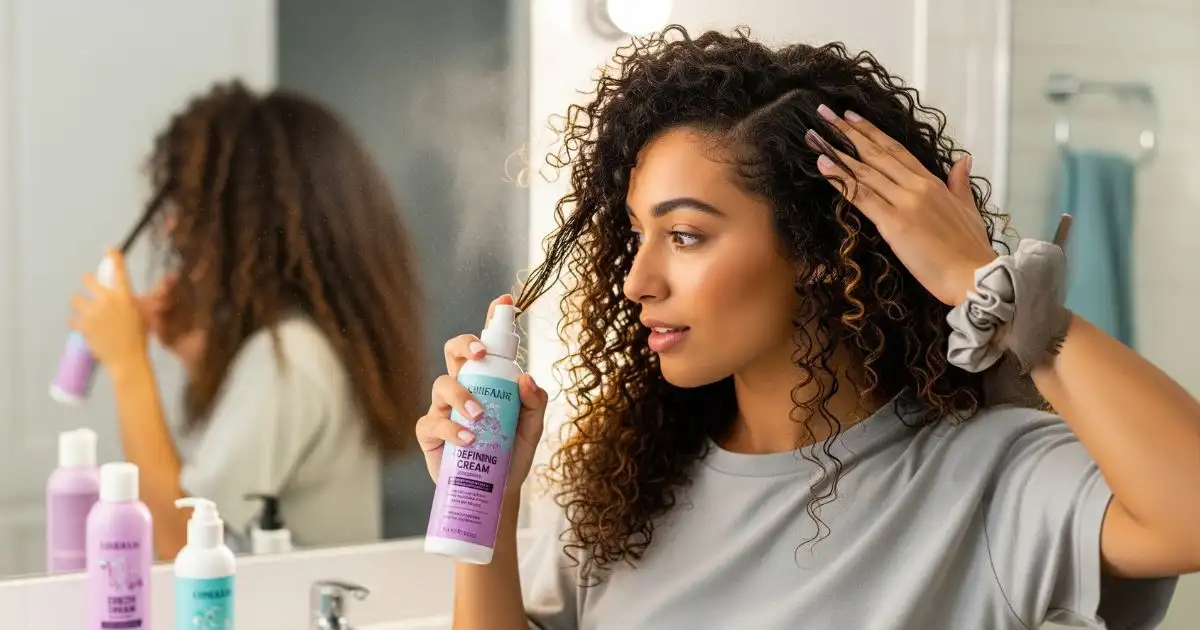
Step 2 – Moisturize and Dry Gently
After washing, your curls need extra love to lock in moisture and prevent breakage. Skipping this step often leads to frizz, split ends, and difficulty brushing.
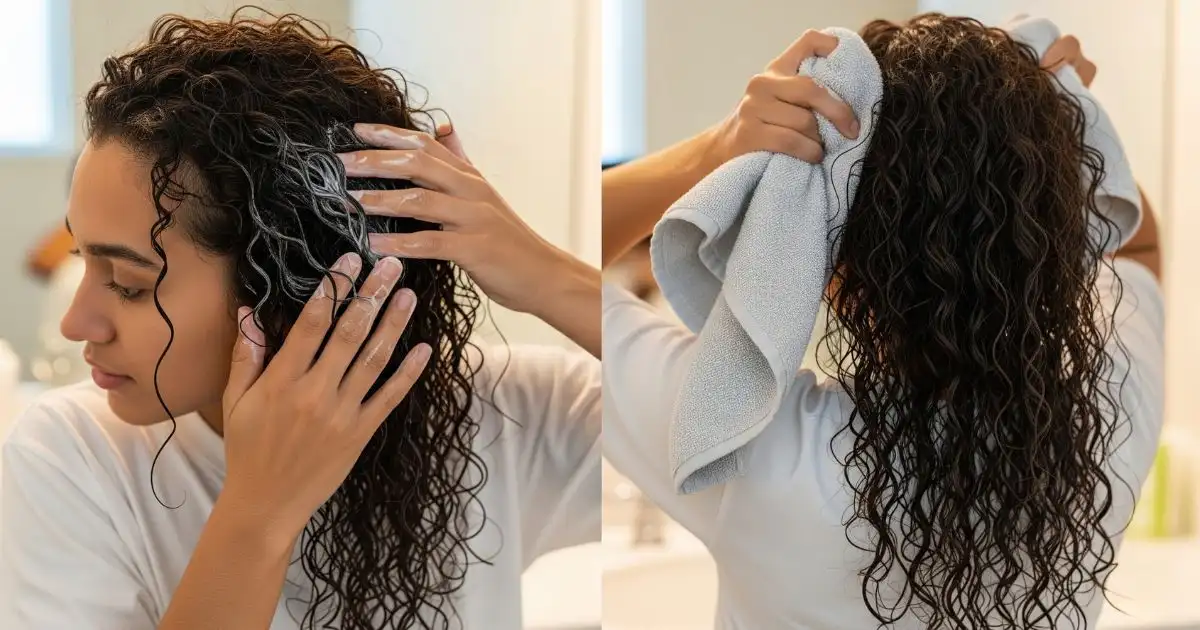
You may think that a blow dryer is easier, and honestly, it is. However, this will really dry out your hair and will make it that much easier to end up damaged. Also, gently squeeze your hair; avoid rubbing or scrunching it. This will make it more frizzy and curly.
Moisturize properly:
- Apply a leave-in conditioner to keep your curls soft and manageable. This adds slip, making brushing much easier later.
- Always use a heat protectant spray if you plan to blow-dry or straighten your hair, as it forms a barrier that reduces heat damage.
- For added shine, try a lightweight argan oil or serum, focusing on the ends.
Dry with care:
- Swap rough cotton towels for a microfiber towel or a soft cotton T-shirt. These fabrics are gentler on curls and reduce frizz.
- Instead of rubbing, gently blot and squeeze out the water. Rubbing stretches curls and causes breakage.
- If you use a blow dryer, always attach a diffuser and keep it on cool or low heat. Hold the dryer at least 6 inches away from your hair to prevent damage.
- Better yet, let your hair air-dry 70–80% before styling. This helps maintain your natural curl pattern while reducing heat exposure.
If your curls tend to get very dry, try the LOC method (Leave-in, Oil, Cream) to layer moisture and lock it in. This keeps your curls soft even after brushing.
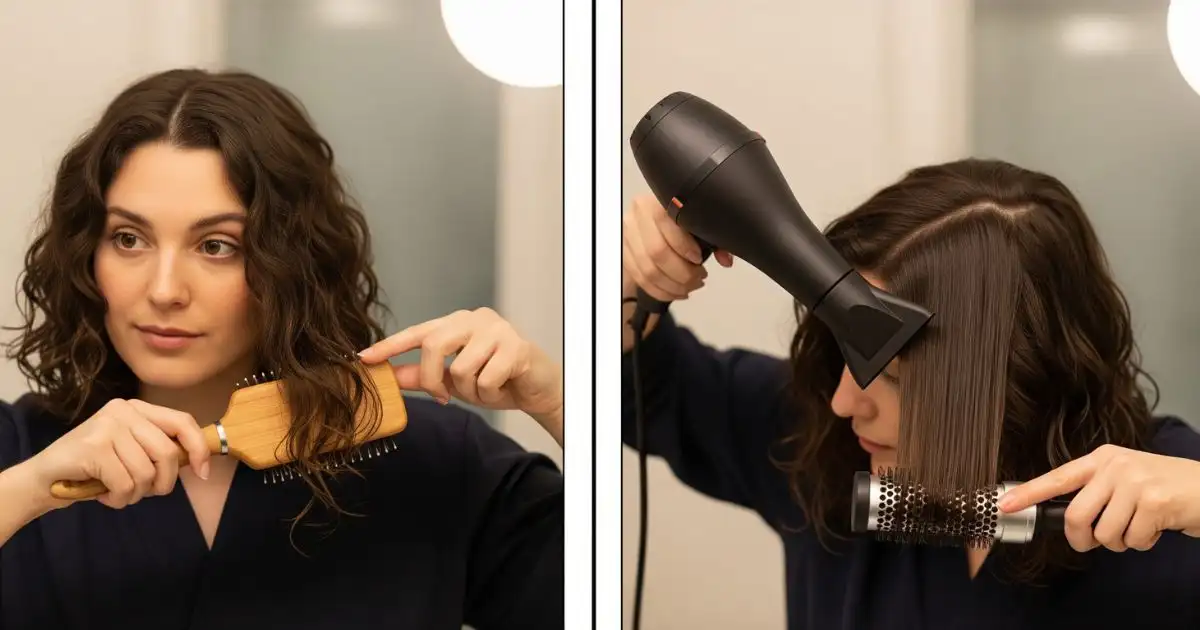
Step 3 – How and When to Use a Brush and a Blow-Dryer
Once your hair is washed, conditioned, moisturized, and about 70–80% dry, it’s time to bring out the blow dryer and brush. This stage is all about smoothing your curls without stripping away moisture or causing unnecessary frizz.
Here’s the right way to do it:
- Make sure your hair is damp, not soaking wet. Blow-drying dripping-wet curls increases the risk of heat damage.
- Always start on the lowest heat and speed setting. High heat may seem quicker, but it can weaken your strands and cause them to become frizzy over time.
- Keep the dryer at least 6–8 inches away from your hair. Holding it too close concentrates heat and can cause your curls to burn or dry out.
- Use a round ceramic brush for smooth, voluminous results, or a paddle brush for a sleeker, straighter look.
- Work in small sections. Wrap a section of hair around the brush, gently pulling it taut, and aim the dryer downward from the roots to the ends. This seals the cuticle and keeps hair smooth.
- If your dryer has a cool-shot button or cold air setting, use it at the end of each section. Cool air locks your style in place and adds shine.
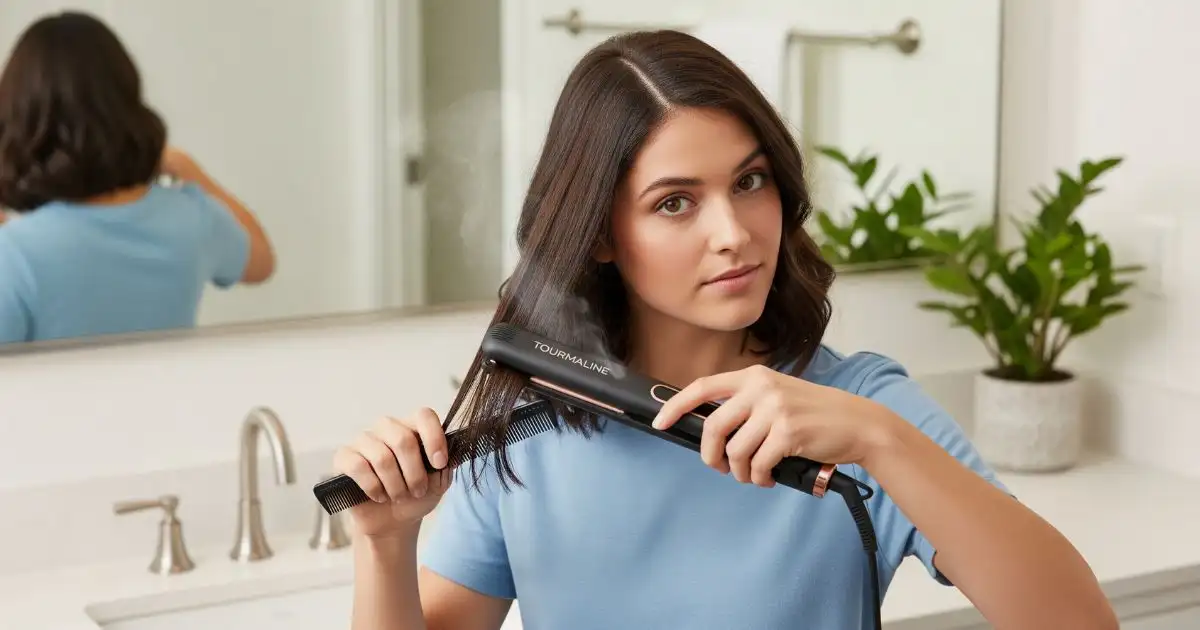
Step 4 – Ironing Your Hair Properly
A flat iron is often the final step to achieving perfectly straight hair, but it must be used carefully to avoid long-term damage. Choosing the right tool and technique makes all the difference.
Choosing the right flat iron:
- Opt for a flat iron with ceramic, titanium, or tourmaline plates.
- Ceramic heats evenly and is ideal for fine or medium hair.
- Titanium heats quickly and works well for thick, coarse curls.
- Tourmaline reduces frizz and adds shine, making it great for dry or damaged curls.
- The plate width should be 1 to 1.5 inches. Wider plates are harder to control and may not straighten curls evenly.
- Always use a heat protectant spray before ironing to create a barrier between your hair and the heat.
How to straighten curly hair with an iron:
- Divide your hair into small sections (about 1 inch wide). Clip the rest out of the way for easier handling.
- Hold each section tightly and run the flat iron slowly from the roots to the ends. Don’t clamp too hard — firm but gentle pressure is enough.
- If you hear a sizzling sound, it means your hair isn’t dry enough. Stop immediately and let it dry further to avoid damage.
- Never use the highest heat setting. Stick to 300–350°F (150–175°C) for fine hair and up to 400°F (200°C) for thicker hair.
Step 5 – Maintaining Your Straightened Curly Hair
Straightening your curls takes effort, so it’s only natural to want the results to last. With the right care, you can maintain smooth, shiny, and frizz-free hair for days.
Finishing touches:
- Apply a few drops of anti-frizz serum or argan oil to add shine and tame flyaways. Focus on the ends to avoid greasy roots.
- Lightly mist your hair with a flexible-hold hairspray, applying mostly at the roots. This prevents your curls from bouncing back too quickly.
How to make it last longer:
- Use dry shampoo or even baby powder at the roots when your hair starts to get oily. This keeps it fresh without washing.
- Avoid water and humidity whenever possible. If you’re heading outside, consider a light anti-humidity spray to protect your style.
- At night, wrap your hair in a silk or satin scarf, or sleep on a silk pillowcase. This reduces friction and helps your style stay intact.
- If some areas lose their sleekness, do a quick touch-up with your flat iron on low heat instead of redoing the whole head.
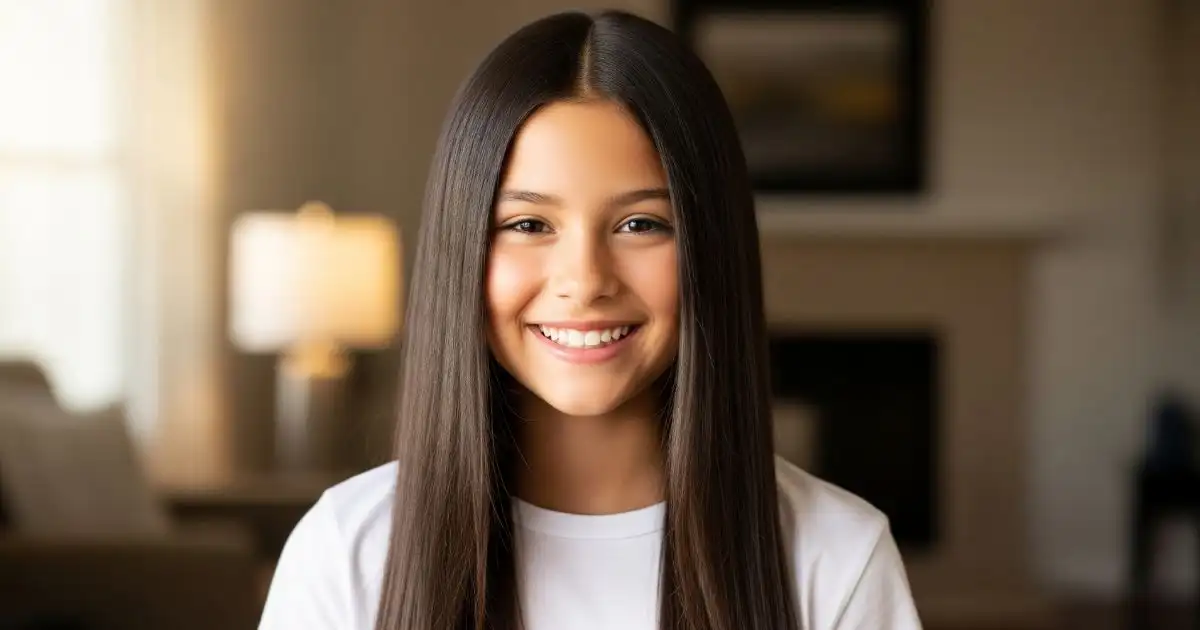
Conclusion
Straightening curly hair isn’t just about running a flat iron through your strands; it’s a process that requires patience, the right tools, and proper technique. By preparing your hair beforehand, using your blow dryer and brush wisely, ironing with care, and maintaining the results, you not only achieve a sleek, polished look but also protect your hair’s health in the long run.
Keep in mind that every head of hair is unique. What works for someone else may need adjusting for your texture, thickness, or curl pattern. Experiment with different heat settings, brushes, and serums until you find the combination that yields the best results without unnecessary damage.
Most importantly, remember that straightening is temporary. To achieve long-lasting, healthy results, balance heat styling with good hair care practices, including deep conditioning, regular trims, and giving your hair breaks from heat whenever possible.
So, the next time you want smooth, silky, straight hair, follow these steps carefully and enjoy a style that looks great, feels great, and keeps your curls healthy underneath.
Leave a Reply